

Looking to start filming for YouTube but feeling overwhelmed by equipment choices? Don't rush into spending large sums on professional gear. Your content quality matters more than expensive equipment, especially when starting out.
The good news: you need only a minimal budget-friendly setup for decent video quality. This article provides a clear guide to essential equipment with the best price-to-quality ratio for beginners.
Essential Filming Kit
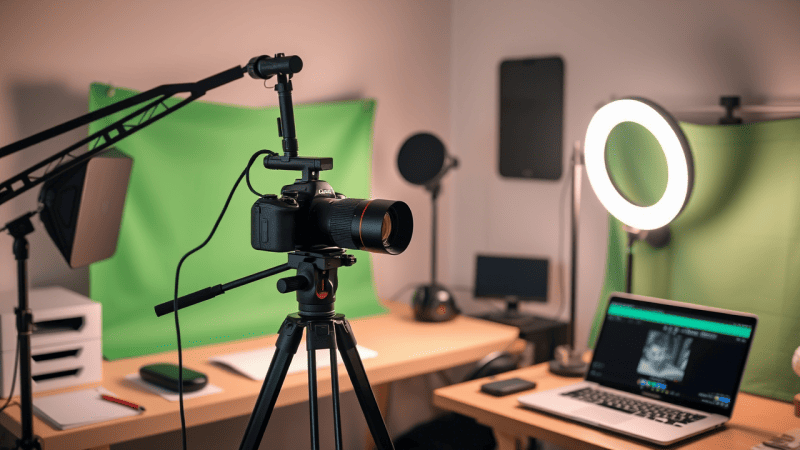
Don't overwhelm yourself at the start. A minimal yet effective beginner's kit includes just 5 elements:
- Your primary camera, most often a smartphone
- A microphone for clean audio
- A lighting source for clear footage
- A tripod for stable imagery
- A neutral background to avoid distracting viewers
Sound quality is more critical than video quality – viewers won't forgive poor audio. Your smartphone makes an excellent starter camera if its specifications allow 1080p video recording. Begin with this foundation and upgrade equipment as your channel grows.
Camera Selection Strategy
Forget the myth that you need an expensive camera to start. Modern smartphones, even non-flagship models, capture decent 1080p Full HD video – sufficient for YouTube. Your objective is to utilize its potential at 100% capacity.
Resolution and Frame Rate Optimization
1080p Full HD (1920x1080) represents the ideal starting point. This YouTube standard balances quality with file size efficiency. 4K consumes excessive storage and requires powerful PCs for editing – reserve this for future implementation.
30 frames per second (fps) provides universal compatibility. Perfect for calm vlogs, reviews, and interviews. 60 fps benefits smooth fast-motion capture but doubles data volume.
Navigate to camera settings, select video resolution, and choose 1080p at 30fps.
Stabilization Implementation
Even minor camera shake appears unprofessional and fatigues viewers. Electronic Image Stabilization (EIS) exists in virtually all modern smartphones. Look for the "shaking hand" icon or "Stabilization" option in video settings.
Optical Image Stabilization (OIS) – physical lens stabilization – appears in premium models. It outperforms EIS but isn't critical for beginners. If available, activate it.
Combine tripod usage with stabilization settings to achieve perfectly steady footage.
Focus and Exposure Control
Before recording, tap the screen where maximum sharpness is required – typically your face or primary subject. The smartphone will focus and adjust brightness (exposure) accordingly.
On most smartphones, holding your finger on the screen locks these values, displaying "AE/AF Lock." This proves useful when lighting or composition remains constant.
Advanced Camera Configuration
Master auto mode shooting before transitioning to manual settings. For 90% of beginners, 1080p/30fps and clean audio suffice. Once you've mastered mobile filming basics, experiment with manual configurations:
Shutter Speed determines frame capture duration. For smooth video, apply this formula: 1 / (2 × fps). When filming at 30 frames per second, set 1/60 second. For 60 frames – 1/120 second. Excessively low shutter speed blurs motion; high settings create choppy footage.
ISO controls sensor light sensitivity. Begin with minimal values (50-100 units). Increase ISO only in dark conditions, but never exceed 800 – otherwise grainy noise appears. Remember: lower ISO produces cleaner imagery.
White Balance (WB) eliminates color distortions. Enable auto mode (AWB) when uncertain. For precise adjustment: point the camera at white paper under current lighting and lock the value.
Bitrate affects detail level and file size. For Full HD (1080p) at 30 frames/second, set 20-50 Mbps. For 4K – 50-100 Mbps. Exceeding 50 Mbps risks smartphone overheating.
Configuration Sequence:
- Select frame rate (30 or 60 fps)
- Set shutter speed using the formula above
- Lock ISO at minimum value (50-100)
- Adjust white balance
- Choose appropriate bitrate
Avoid these settings for dynamic scenes – auto mode handles them better. With frequent lighting changes, manual parameters complicate filming. When time is limited, trust automatic settings.
Critical Camera Mistakes to Avoid
YouTube operates as a horizontal platform; vertical videos are only needed for Shorts. Rotate your smartphone 90 degrees before filming.
Always clean the lens. Fingerprints or dust create blurry footage.
Don't purchase cheap clip-on camera lenses. They almost always degrade built-in optics quality.

Microphone Selection and Audio Strategy
If video content is engaging, viewers will forgive average picture quality. But poor audio with noise, echo, or unclear speech represents the primary reason people close videos.
Technical Specifications for Microphone Selection
Directional Pattern Determines optimal sound capture direction. Cardioid pattern is ideal for content creators – it captures sound from the front while effectively suppressing noise from behind and sides. Supercardioid narrows the front zone and better suppresses side noise but may catch sound from behind. Omnidirectional captures all surrounding audio. For beginners, cardioid microphones are preferable, though typically more expensive. Omnidirectional can work but requires careful attention to ambient noise levels.
Frequency Response Range Shows which sounds the microphone can record, from bass to treble. For voice recording, the critical range is 100 Hz - 15,000 Hz. A microphone effectively transmitting this range, such as 50 Hz - 16 kHz, will make your voice sound natural and clear. Excessively narrow range produces flat or muffled voice quality.
High-Pass Filter Cuts extremely low frequencies, typically below 75-100 Hz. This removes refrigerator hum, traffic noise, ventilation sounds, footsteps, and plosive sounds on letters "P" and "B." Always enable when the microphone is positioned near your mouth.
Pad/Attenuator Reduces microphone sensitivity by a fixed amount, usually -10dB or -20dB. This prevents distortion when shouting, singing, or near very loud sources. Beginners rarely need this feature, but it's useful for high-volume recordings.
Signal-to-Noise Ratio (SNR) Measured in dB, showing how much louder your voice (signal) is compared to the microphone's self-noise. Higher SNR, such as >70 dB, produces cleaner recordings. Low SNR creates audible hissing background noise. Look for models with 70-80 dB SNR.
Microphone Types and Operating Principles
Condenser/Electret Microphones Most popular for studio voice recording. Highly sensitive, capturing detail and naturalness. Requires phantom power (48V) or battery (for lavaliers/some USB models). Sensitive to moisture and impacts.
Dynamic Microphones More durable, less sensitive, better at suppressing background noise, resistant to moisture and loud sounds. Commonly used for live performance and noisy environments.
Both types suit beginners, but condenser microphones typically deliver cleaner studio voice quality in quiet rooms.
Technical Specifications Continued
Sensitivity Shows how loudly the microphone converts sound to electrical signal (mV/Pa). High sensitivity captures quiet sounds but may overload more easily from loud sources. Low sensitivity requires powerful preamplification.
Impedance Measured in Ohms (Ω). Low impedance (50-600 Ohms) is standard, ensuring better signal transmission without cable losses. Simply ensure the microphone is low-impedance (Low-Z).
Sample Rate Relates to the audio interface or built-in USB microphone converter (ADC), not the microphone itself. Measured in kHz. 44.1 kHz or 48 kHz represents the YouTube standard – sufficient for high quality. 96 kHz/192 kHz serves professionals but increases file sizes. For beginners, 48 kHz is optimal.
Microphone Category Analysis
Lavalier (Lav) Microphones
Ideal for mobility and minimal noise interference. Primary advantage: proximity to mouth (15-20 cm) ensuring clean voice signal and maximum background noise suppression. Most affordable option. However, cables restrict movement and may rustle against clothing, while the miniature capsule remains visible on-chest in frame. Choose models with TRRS connector (3 black stripes) for direct smartphone connection. Select this option for limited budgets, varied shooting locations, or active movement within frame.
On-Camera or Desktop Microphones
Perfect balance between quality and mobility. Mounts on camera, DSLR, smartphone on tripod, or sits on desk. User-friendly, requires no clothing attachment, and significantly outperforms built-in smartphone/camera microphones. Typically features cardioid or supercardioid patterns, effectively suppressing rear noise. Due to greater mouth distance (30-50 cm), captures more background noise than lavaliers. Choose for simple setup and acceptable quality without clothing cables.
USB Microphones
Superior audio quality for stationary recording. Connects directly to computer or smartphone via OTG. Delivers fuller, professional voice quality through large capsule and built-in quality amplifier/ADC. Often features cardioid pattern, volume control, and mute button on body. Primary disadvantage: complete immobility – you're tethered to the computer position. Choose only for desk-based filming when sacrificing mobility for superior audio quality.

Optimal Microphone Specifications for Beginners
Recommended Characteristics:
- Cardioid or omnidirectional pattern
- Signal-to-noise ratio (SNR) >70 dB
- Low-cut filter (High-pass) essential
- Frequency range: 100 Hz – 15,000 Hz
Quiet room environment and proper microphone positioning matter more than expensive models. Always conduct test recordings before filming.
Lighting Strategy and Implementation
Poor lighting destroys even 4K video quality. Effective lighting can transform your content:
Natural Light Optimization
Position yourself facing the window or at a 45-degree angle. Avoid positioning with your back to the window – you'll create a silhouette. Optimal shooting times: morning/evening with soft light; overcast weather acts as a natural softbox. However, this creates weather dependency.
Budget Softbox Solutions
Budget softboxes represent the best stability solution. Position side-front at 45° to your face. Diffuses light, eliminating harsh shadows. Choose affordable LED panels (20-50W) with fabric diffusers.
Ring Light Applications
Accessible option for facial filming. Provides even, shadowless illumination. Position behind camera, ring surrounding lens. Disadvantages: creates unnatural circular eye reflections and poorly illuminates backgrounds. Optimal diameter: 12-18 inches.
Lighting Mistakes to Avoid
Forget built-in smartphone flash – it flattens faces and darkens backgrounds. Avoid overhead lighting (chandeliers, spotlights) – creates under-eye and nose shadows. Don't mix different light types – skin acquires strange tints.
Tripod Selection and Stability
Shaky footage represents professionalism's greatest enemy. Even expensive cameras without tripods appear amateurish. The solution is simple and budget-friendly:
Flexible Tripods
Ideal for smartphones and creative angles. Flexible legs wrap around branches, railings, poles. Advantages: inexpensive, compact, mounts anywhere. Disadvantages: unstable on uneven surfaces, limited height.
Floor/Desktop Tripods
Foundation for stationary filming. Optimal height: 1.2–1.7m. Look for rubber non-slip tips, horizontal level for straight frames, load capacity from 1kg even for phones.
Stability Requirements
Tripod should outweigh your camera/phone. Flimsy plastic models shake from drafts. Place tripod on floor, gently push – if camera oscillates more than 2 seconds, find a more stable model. Wind or vibrations amplify problems.
Adjust height for your stature. Sitting at desk – 40cm suffices. Standing filming – minimum 1.2m for eye-level camera positioning.
Background Strategy and Visual Management
Cluttered or busy backgrounds steal viewer attention. Objective: neutral space without visual noise. Solutions exist even with zero budget:
Solid Wall Solutions
Ideal option. Light shades visually expand space; dark tones add contrast. Remove all objects within 1.5 meters – books, clothing, cables. Take test shots; notice unnecessary objects? Remove them.
Fabric Alternatives
Flat sheets or bedspreads serve as emergency replacements. Stretch fabric on wall or doors without wrinkles using binder clips. Prefer cotton, linen, dense knits. Avoid gloss (reflects), stretch (wrinkles), patterns (distracts).
Professional Backdrop Options
Fabric or paper rolls (1.5×3m) create professional appearance for 500–2000 rubles, potentially complemented by collapsible frame systems.
Critical Background Mistakes
- Clutter behind you: dirty dishes, open wardrobes, cables
- Bright accents: neon posters, flashing electronics, windows with moving vehicles
- Unchecked backgrounds: protruding fabric corners, shelf shadows, glass cabinet reflections
When filming with smartphones, position 1–2 meters from background; blur reduces problematic area detail. Place lamp or softbox behind yourself, directing toward wall to create light spot separating you from background. Record video where you exit frame – if empty frame catches attention on background objects, backdrop requires improvement. Even expensive backgrounds won't help if electrical outlets or sleeping cats appear in frame.

Equipment to Avoid as Beginning Creator
Here's what not to purchase initially, saving 15–50 thousand rubles without quality compromise:
Expensive Camera Systems
DSLR/mirrorless cameras. Modern smartphones capture excellent 1080p. Purchase only when monetizing channel, needing cinematic background blur, filming in darkness, or shooting action scenes.
Professional Lighting Kits
3+ light source setups. For 90% of creators, window + 1 softbox or ring light suffices. Exception: product/makeup filming requiring perfect color accuracy.
Premium Editing Software
Adobe Premiere Pro or Final Cut Pro. Free alternatives deliver identical results for 1080p editing. Transition to paid software when earning YouTube revenue.
Excessive Storage
256+ GB memory cards. 1 hour of 1080p/30fps video equals approximately 10–15 GB. 64 GB accommodates 4–6 hours of raw footage; maximum requirement: 128 GB for multiple takes.
Expensive Microphones
Audio quality depends on room silence, proper positioning, and low-cut filter presence, not just price.
Green Screen (Chroma Key)
Adds 30% editing time. Instead, use neutral walls, add backgrounds through masking if critical. Purchase chroma key only for educational content with graphics.
Equipment Validation Framework
Before any purchase, ask yourself:
- Will this solve a specific problem in my current videos?
- Can I achieve the same result free or cheaper?
- Will this pay for itself within 3 months?
Purchasing a 100,000-ruble camera for a 500-subscriber channel represents wasted investment.
Essential YouTube Equipment Summary
Remember the fundamental principle: successful channels begin with content quality and clean audio, not expensive equipment.
Your Minimal Starter Kit:
- Smartphone with 1080p/30fps and stabilization
- Microphone: lavalier, USB, or on-camera, preferably cardioid
- Single light source
- Tripod: flexible or floor-standing, prioritizing reliability
- Clean wall or sheet background
Don't wait for perfect conditions. Poor audio outweighs average video quality; quiet rooms matter more than new iPhones; your energy exceeds 4K resolution value.
Implementation Action Plan
Execute today:
- Choose quiet location with good lighting
- Mount phone on tripod, enable 1080p/30fps
- Connect microphone, test recording with headphones
- Clear frame of unnecessary objects, create test footage
Cameras improve video quality, but only you create value. Film your first video BEFORE purchasing new equipment. If it maintains attention – you're on the right path. Don't let perfectionism steal your starting opportunity.