

Proper lighting setup determines 80% of your video and photo quality—more than your camera or expensive lenses. Many creators struggle with common issues: shadowed faces, harsh glare, or noisy footage in dim conditions.
This comprehensive guide covers home studio lighting techniques to elevate your content to professional standards. You'll learn fundamental lighting principles, natural light optimization methods, and strategic light source placement. We'll explore proven lighting schemes and address low-light shooting challenges to help you create exceptional content in any environment.
Core Lighting Principles for Content Creation
Professional-looking footage doesn't require complex equipment. Understanding one foundational concept unlocks most lighting scenarios: three-point lighting.
This framework defines three essential light sources, each serving a specific purpose:
Key Light. Your primary and most powerful light source. Position it front-and-side of your subject at approximately 45 degrees. This creates the foundational light-and-shadow pattern on faces or objects. Strategic placement eliminates harsh shadows and establishes optimal illumination.
Fill Light. Positioned opposite your key light, this source doesn't create new shadows—it softens existing shadow areas created by the key light, reducing their depth. Keep intensity lower than your key light, often using reflectors or diffusers. This element solves low-light challenges and eliminates excessive contrast.
Back Light. Place this source behind your subject, elevated above head level, directed toward them. It creates a luminous edge that separates the subject from the background, adding depth and dimension. This detail immediately elevates footage from amateur to professional quality.
You don't need three expensive fixtures. A window can serve as your key light, or a single LED panel. White walls, foam board, or poster board function as fill by reflecting light back toward your subject. A standard desk lamp with a daylight bulb, carefully positioned behind you, works as back light. This framework applies to any shooting scenario—from portraits to product reviews.
Lighting Categories and Selection Strategy
Lighting choices directly impact atmosphere and footage quality. All lighting types fall into two primary categories: natural and artificial.
Natural Light Photography
Natural lighting utilizes available sunlight or window light. This popular home setup option requires no specialized equipment.
Position your subject facing or angled toward a window. Add a reflector opposite the window to soften shadows—either professional equipment or simple white cardboard works effectively.
Light intensity and color temperature shift throughout the day. Overcast conditions provide soft, diffused light without harsh shadows—ideal for portrait work. Direct midday sun creates excessive contrast and complicates shooting.
Artificial Lighting Solutions
Artificial lighting provides complete control over your lighting environment. This includes both household fixtures and professional equipment:
Continuous Light. LED panels, ring lights, and constant-output sources belong to this category. Primary choice for video work—you immediately see how light falls on your subject and adjust in real-time. These sources deliver predictable, user-friendly illumination.
Flash/Strobe Lighting. Typically used in photography, providing powerful brief light bursts. More complex to master since results are only visible after flash activation.
When using artificial sources, avoid mixing different bulb types—combining LED with incandescent creates color balance issues in footage.

Mixed Lighting Approach
Professional shoots often combine natural and artificial sources. A window might serve as key light while you add artificial fill or back light from other angles to achieve desired dimensionality.
Lighting type selection depends on your objectives, budget, and conditions. Start with available natural light, then gradually incorporate artificial sources for enhanced control.
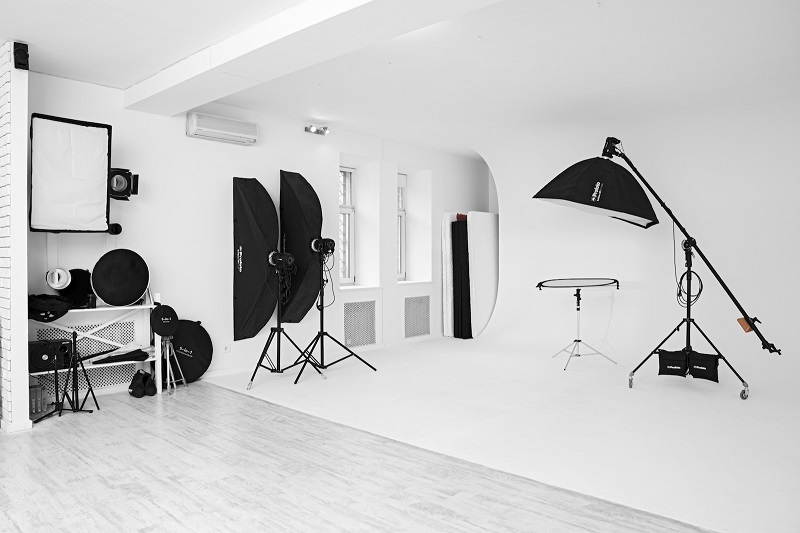
Home Studio Lighting Equipment
Quality results don't always require expensive equipment. Home studio lighting combines both professional fixtures and simple household solutions.
Professional Light Sources
Investment-grade equipment provides complete lighting control:
Ring Lights. Ideal for beauty content, creating even, shadow-free illumination for vlogs and portraits. Produces characteristic circular eye reflections. Currently among the most popular home content creation light sources.
LED Panels. Versatile option allowing brightness and color temperature adjustment from warm to cool tones. Functions as key, fill, or back light. Compact models work excellently for mobile content creation.
Softboxes. Light modifiers that create soft, diffused illumination, eliminating harsh shadows. Frequently used in portrait and product photography.
Prioritize quality over quantity or power. A single quality LED panel with proper modifiers—softbox, reflector, and diffuser—often outperforms three inexpensive bright sources producing harsh shadows.
Household Lighting Solutions
Don't overlook standard household lamps—proper use significantly improves footage quality:
Desk Lamps. Direct light from powerful daylight LED bulbs toward ceilings or white walls for soft, bounced illumination rather than harsh shadows. Simple method for creating fill light.
Floor Lamps and Standing Fixtures. Similarly, aim these toward ceilings for soft ambient light, avoiding dim lighting conditions.
Use bulbs with consistent color temperature—all cool or all warm white—to prevent color casts in footage.
Lighting Accessories That Transform Results
Often these accessories are the secret to quality illumination:
Reflectors. Professional equipment isn't necessary. White foam board, poster board, large white cardboard, or even white sheets effectively bounce light and fill shadows. Essential for window light work.
Diffusers. Soften harsh lamp or sunlight using translucent materials—white fabric, parchment paper, or specialized diffusion material stretched on frames positioned before light sources.
The key to artificial lighting work: don't blind your subject—properly soften and direct illumination. Remember that even with professional fixtures, simple white cardboard as a reflector remains your best tool. Minimal cost, transformative results.
Mobile Content Lighting
Mobile content creation has dedicated solutions:
Compact LED Fixtures. Small panels mounting directly to smartphones, solving the primary mobile challenge—insufficient light. They reduce noise and sharpen footage.
Mini Ring Lights. Same concept as full-size versions, designed specifically for smartphone mounting.
Expensive equipment isn't always necessary. Start experimenting with available household items: bounce lamp light off walls, use white paper as reflectors. This alone creates significant improvement and builds fundamental lighting understanding for video and photo work.
Lighting Schemes for Common Scenarios
Proven setups help you quickly configure lighting for standard content creation situations.
Portrait and Interview Setup
This scheme uses classic three-point lighting, perfect for video interviews, monologues, or vlog hosting:
Key Light. Position your primary source—softbox or window—left or right of camera at approximately 45 degrees to yourself. Slightly above eye level.
Fill Light. Opposite side at face level, place a reflector—white foam board, professional reflector, or poster board. Purpose: gently illuminate shadows from nose and chin created by key light. If shadows remain too deep, replace reflector with a second, less powerful source like a mobile light or dimmed LED panel.
Back Light. Position another source—lamp, for instance—behind and slightly beside yourself, directed at head and shoulders. Creates luminous edge separating you from background, adding dimension and professional appearance.

Result: dimensional, dynamic footage without flat faces and harsh shadows.
Process Content Setup—Cooking, Crafts, Reviews
Here you need to illuminate both yourself and workspace so hands and objects remain clearly visible:
Primary Table Lighting. Install two matched sources—two LED panels or daylight desk lamps—flanking the table, slightly elevated. Direct toward work area. Prevents harsh shadows from hands and tools.
Host Lighting. If you're consistently on-camera, add a third source functioning as key light for your face, similar to the first scheme. Position to avoid obstructing table view or creating glare.
Camera should face away from light sources, not toward them. Ensure you don't block table lighting yourself. Result: well-illuminated workspace and presenter, without shadows on critical process elements.
Product Photography Setup
Objective: emphasize details, texture, and form while minimizing unwanted shadows:
Side Lighting for Texture. Position one source beside the object, highlighting surface qualities—citrus peel texture, fabric weave, packaging sheen.
Back Lighting—Rim Light. To separate object from background and create subtle edge glow—particularly effective for liquids or glass—add another source from behind.
Shadow Fill. Opposite your main light, position a white reflector. Eliminates excessive shadow depth and softens overall lighting. For small objects, simple white paper functions as reflector.
Result: clean, detailed footage where products appear attractive and professional.
Low-Light Shooting
When conditions prevent proper lighting, this scheme provides a solution:
Single Frontal Source. Position one powerful source—ring light or mobile light—as close to camera lens as possible. While producing flat imagery, this guarantees facial shadow elimination and enables shooting in dim conditions without excessive noise.
Leverage Environment. Face the brightest wall available—it functions as a giant reflector, gently filling facial shadows.
Post-Production Correction. Shoot in maximum available quality for editing flexibility, allowing shadow and brightness recovery in post.
This fallback approach enables shooting in any conditions, though requiring quality compromises.
Low-Light Shooting Techniques
Low-light shooting presents one of the most common challenges. Footage becomes noisy, blurred, and unclear. Here's how to improve results even in difficult conditions.
Maximize Available Light:
- Identify Sources. Face windows even after dark. Street lights or illumination from neighboring buildings may provide sufficient lighting.
- Deploy Reflectors. Light-colored walls, large white cardboard sheets, or even light clothing help bounce available light and soften facial shadows. Simple solution for dim lighting conditions.
Camera or Smartphone Settings:
- Increase ISO Cautiously. Raise ISO values while recognizing that higher settings introduce digital noise. Find the balance where noise remains acceptable.
- Open Aperture. For camera work, set minimum aperture values—f/2.8 instead of f/5.6, for example. This captures more light.
- Stabilize Camera. Use tripods or stable surfaces, enabling longer shutter speeds without motion blur.
Additional Light Sources:
- Activate All Lamps. Utilize every available room light—desk lamps, floor lamps, overhead fixtures. Direct toward walls or ceilings for diffused illumination.
- Screen Light. Bright laptop or tablet screens can function as temporary fill light sources for video.
- Mobile Lighting. Even small external mobile light sources significantly improve image quality in low-light conditions.
Post-Production:
- Editor Correction. Most editing software allows brightness, contrast adjustment, and noise reduction. Shoot in maximum quality for greater editing flexibility.
- Black-and-White Conversion. If color footage appears excessively noisy and difficult to correct, convert to black-and-white. Often conceals flaws and adds artistic quality.
The optimal solution to poor lighting: prevention. When possible, always add at least one supplementary source, even basic household lighting. This significantly enhances content quality.
Implementation Recommendations
Quality lighting forms the foundation of successful footage. Experiment confidently with light sources—whether natural window illumination or available artificial lighting. Even a single lamp with reflector can transform dim lighting situations. The critical factor: understand core principles and apply them practically. Begin with straightforward schemes—you'll quickly identify optimal lighting for your specific needs.
Key Takeaways:
- Master three-point lighting fundamentals
- Leverage natural light before investing in equipment
- Simple household items create professional results
- Strategic light placement outweighs expensive gear
- Continuous experimentation develops lighting expertise